Parasite Cryo-Embedding Protocol
Materials
- OCT
- Metal embedding cryomold
- Dry ice
- Minutien Needles 0.2mm, Stainless Steel (Roboz, # RS-6083-20)
- Micro Dissecting Needle Holder, 4 ¾" (Roboz, # RS-6061)
- Pipette tip box cover
- 0.05% Methylene Blue in RPMI
- Zeiss Stemi 508 with a monochrome CMOS camera (DMK 33UX178)
- Parafilm
General Notes
-
To differentiate head from tail on the parasite, look at the parasite under dissection microscopy. The tail will be slightly curved, whilst the head will be straighter and rounder.
-
Clean all cryomolds, tools, and working surfaces with Eliminase prior to the embedding process.
-
Embed twice the number of specimens as needed as this approach is prone to error considering the number of steps and precision required from sectioning to RNA extraction.
How to Orient and Image Nematodes for Downstream Spatial Sectioning Embedding
Parasite Staining
-
In a 10 cm Petri dish, make a 1:5 dilution of 0.05% methylene blue in RPMI and mix with a pipette tip (100 µL of 0.05% methylene blue in 400 µL RPMI is typically used for Brugia adults and L3/L4 from all species).
-
Prepare 3 or 4 100 µL pools of RPMI in the Petri dish. These pools will be used to perform a serial wash the L3/L4 or adults after the staining to remove excess methylene blue.
-
For L3 and L4: Take a group of L3 in a volume of 20 µL using a p20 pipette from a pool of washed L3 and drop them in the pool of diluted methylene blue. For adults: Using a worm hook, take one adult at a time from a culture plate containing sorted/washed adults and transfer to the pool of diluted methylene blue.
-
Allow parasites to soak for two to five minutes. Monitor the colour change using the scope. You may need to add time if not stained completely.
-
Whilst the parasites are staining, prepare the dry ice for embedding:
a. Align the dry ice in a cover from a pipette tip box as evenly as possible.
b. Use one of the metallic cryomolds to shape the ice to the cryomold so it does not slide around whilst imaging.
Parasite Embedding
-
Once L3/L4 or adults are in their final serial rinse, add enough OCT so that it comes up to the first lip of a room temperature cryomold. Once OCT is added, place the cryomold on the dry ice. Ensure that the imaging software is configured in the appropriate way for your experiment, and that the camera is working and the cryomold and expected area of imaging is in focus. Setup a folder with the experiment date, into which the images from embedding will be saved. Save images as .bmp files.
-
L3 and L4: Pipette L3/L4 from the final wash in a volume of 2.5 µL and set to the side. Aspirate 1 µL of 0.05% methylene blue using a pipette and set to the side. Add the 2.5 µL of L3/L4 to the surface of the OCT in the cryomold. With a micro-needle, untangle/uncoil the L3/L4 as quickly as possible. Separate one L3/L4 from the group of parasites in OCT and move to an open area of the cryomold where you aim to image the embedding process. Manipulate the worm to get it as straight as possible. Add a blue dot using the previously pipetted methylene blue on each side of the L3/L4, and then add a second dot above or below the dot next to the head (used for orientation when it comes time for measuring and cryosectioning). Note: You will not be able to see the L3/L4 in the OCT until the bottom of the OCT/cryomold freezes.
-
Adults: Aspirate 1 µL of 0.05% methylene blue using a pipette and set to the side. Using a worm hook, transfer the adult from the final wash pool to the surface of the OCT in the cryomold. With a micro-needle, untangle/uncoil the adult as quickly as possible. Manipulate the worm and move the head so that it is pointing toward the right edge of the cryomold. Try to get the head as straight and parallel to the horizon as possible. Make sure the head is not overlapping with any other part of the body. Add a blue dot next to the head of using the previously pipetted methylene blue.
-
-
Before the worm completely freezes, take pictures every three seconds. Record the magnification and imaging data used to capture the image. You will have 45 seconds between placing cryomold on the dry ice and complete OCT block freezing.
-
Once the OCT block completely freezes, remove the cryomold from dry ice. Remove the dry ice block from the cryomold. Wrap in a piece of parafilm. On a paper label, add the date, stage, species, and sample number. Place this label on top of the parafilm-wrapped OCT block. Wrap both in a larger piece of parafilm and twist the corners together to close. Place the sample in the -80ºC until ready to be used for cryosectioning.
-
Repeat the above steps until an appropriate number of adults have been embedded.
Measuring Distances for Cryosectioning
Note: Organise images in a logical way on the desktop of the imaging computer. Once images are organised, move the images to your personal folder in Box. Once all measurement data has been recorded, keep the images in your Box folder, but remove the images from the imaging desktop.
-
Open Fiji and the Box folder containing your embedding images. Select the best image from the series of images you took from a single worm. The best image is one where the OCT is about to freeze over, but the dot and worm are still visible.
-
Click and drag the image to the Fiji toolbar. This will open the image in the Fiji program.
-
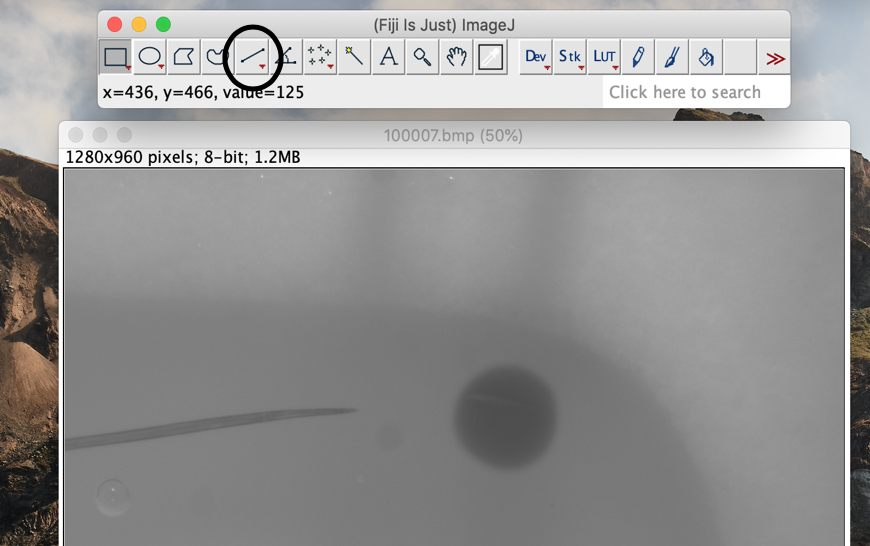
Click on the straight-line tool in the Fiji toolbar.
-
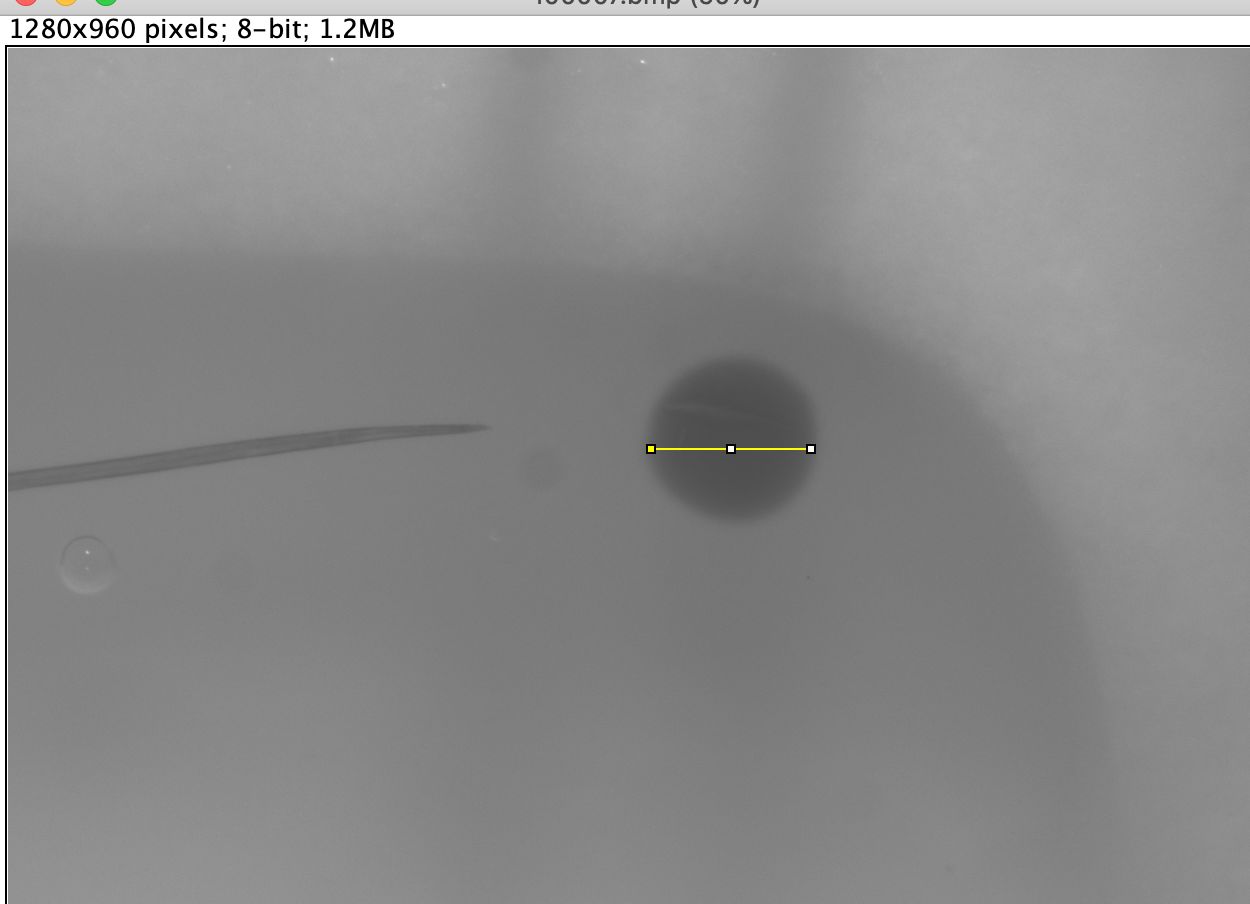
Measure distances by placing the crosshairs of the mouse at your starting point, click and drag to your end point and release the mouse. This should create a solid yellow line, which will be your measurement line. If it is not accurate, repeat this process until satisfied. [img2]
-
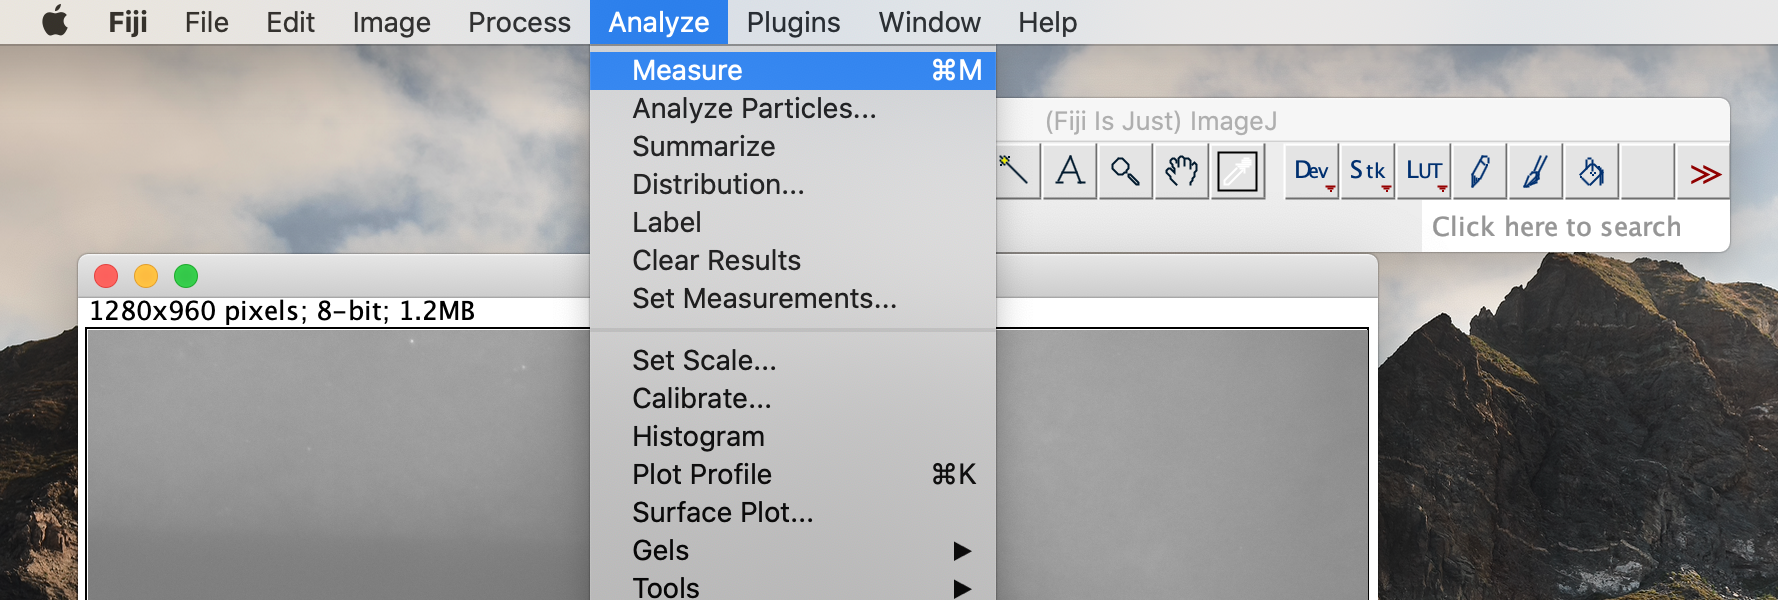
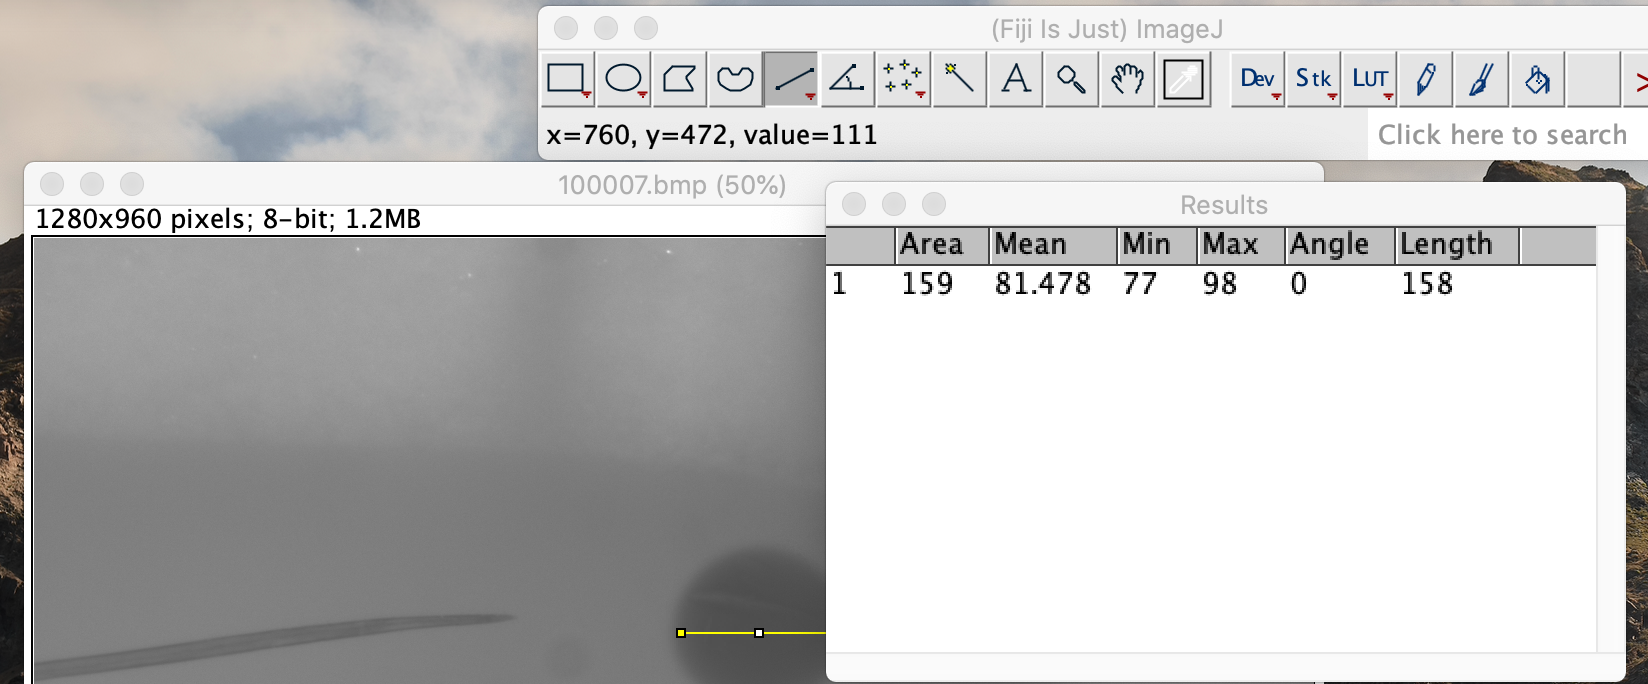
Click on the analysis button in the top toolbar. Select the measurement option. This will bring up a box with measurement data. Record the value under the Length heading. This value is in pixels.
-
Repeat the above process until all essential measurements are recorded.
Adult Measurements: - Start of dot to end of dot - End of dot to start of worm
L3/L4 Measurements: - Distance between end of dot and start of head - Distance between end of dot and tail
Random Embedding for Downstream in situ Applications
Parasite Staining (Optional)
Refer to the staining instructions above.
Prepare Dry Ice
Align the dry ice in a cover from a pipette tip box as evenly as possible. Use one of the metallic cryomolds to shape the ice to the cryomold so it does not slide around whilst imaging.
Parasite Embedding (Jumbled)
Note: Typically done with 2-5 Adult Parasites.
-
Using a worm hook, transfer a group of 2-5 adults from the final wash pool (if staining) or from pre-washed and sorted adults (if not staining) to the surface of the OCT in the cryomold. With a micro-needle, manipulate the adult as quickly as possible. Manipulate the worms so that the block cuts longitudinal sections.
-
Before the worm complete freezes, take pictures every three seconds. Record the magnification and imaging data used to capture the image. You will have 45 seconds between placing cryomold on the dry ice and complete OCT block freezing.
-
Once the OCT block completely freezes, remove cryomold from dry ice. Remove the dry ice block from the cryomold. Wrap in a piece of parafilm. On a paper label, add the date, stage, species, and sample number. Place this label on top of the parafilm-wrapped OCT block. Wrap both in a larger piece of parafilm and twist the corners together to close. Place the sample in -80ºC until ready to be used for cryosectioning.
-
No measurements are required for jumble embedding.